Repainting Tutorial Index
Reflections
Creating a Layered PSD
(optional)
|
Repainting Tutorial Index Reflections Creating a Layered PSD |
We will create the alpha channel that is required for FS to display "reflections" - an effect that makes it appear that bare metal is reflecting its surroundings.
Step 1: Creating the Alpha Channel and Selecting the Bare Metal
|
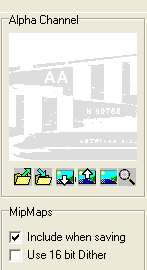
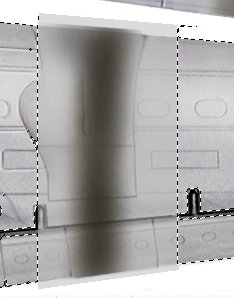
Start PSP if not running already and open your "working" BMP image into PSP. Click OK. If you haven't created one from your latest work on your .PSD file create one now (see (Part 2, Step 2). Now use File/Save As to save this file with the same name, but change the ending to _alpha. So our file (dc6b_leftfwd_t_working.bmp) should be saved as dc6b_leftfwd_t_alpha.bmp. In PSP the alpha channel is usually handled as a "Mask". This is PSP's term for the effect that an alpha channel has in typical graphics applications, which is to control transparency. In fact, if the FS texture name does not end in _t (GMAX only) and/or the aircraft builder did not turn on Reflections when building the plane then the alpha channel will control transparency, not reflections. However, using Masks in PSP can be quite confusing, so we will not be using them. We will treat the alpha channel as a completely separate image, and combine it in DXTBmp just before we create the final FS texture. This also makes it easier for those using different paint programs to follow along as well. You can see an alpha channel loaded into DXTBmp on the left.
|
|
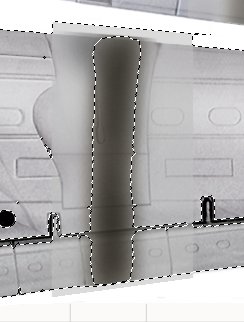
First we need to select all of the bare metal in the new copy of our texture. Choose the Magic Wand Tool, and in Tool Options set the Tolerance 30, Match RGB Value, and Feather 0. The Sample Merged box should be unchecked. The Magic Wand tool selects all contiguous pixels of a color range, based on the pixel that was clicked. Click on the bare metal part of the fuselage. A portion of the bare metal will be selected. Now hold down the Shift key and click just outside the current selection. More of the bare metal will be selected - pressing the Shift key while selecting will ADD to the selection. Watch the image closely when you do this - if the entire image (or incorrect areas) is suddenly selected, use the Undo button to go back. Then reduce the Tolerance number and repeat adding to the selection. Continue doing this with the Shift key pressed until all of the bare metal is selected. It's not important to get every single pixel, and it should avoid any painted areas or lettering. NOTE: It is often easier to start this process by selecting the background color (white in this case), leaving all the bare metal unselected. Choose Selections/Invert. Now all the bare metal is selected (as is all the lettering within the bare metal). With the Selection Tool, hold down the Control key and remove the lettering from the selection by drawing a box around it. Pressing the Ctrl key while selecting will REMOVE it from the selection. Finally, use the Magic Wand and Selection Tools to reselect the small areas of bare metal around the lettering. Don't forget to hold down the Shift key to preserve your current selections. |
  |
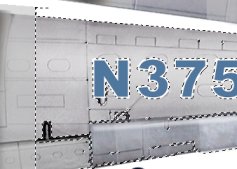
Don't forget the insides of the numbers and letters! Also, select the passenger windows and the lens of the landing light. (Yes, I'm obsessed... :) Also, make sure that things like air intakes are not selected. |
|
When doing the wings (for example) notice that there are painted areas of the wing behind the nacelles, I assume to provide corrosion resistance for the metal from exhaust, fuel, and oil. These are too close in color value to the bare metal to be able to disinguished by the Magic Wand. So, choose the Selection tool, and while pressing the Ctrl key drag a rectangle around those painted areas. They will become unselected. Pressing the Ctrl key while selecting will REMOVE it from the selection.
|
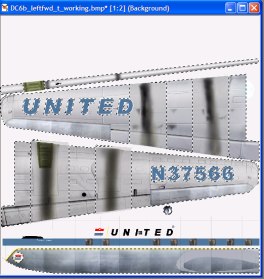 |
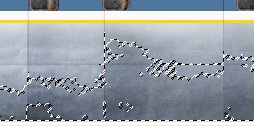
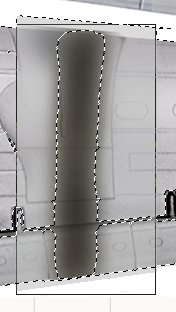
Once you are happy with the bare metal selection, we can start converting this to an alpha channel image. My final selection appears at the left. |
Step 2: Converting to an Alpha Channel
  |
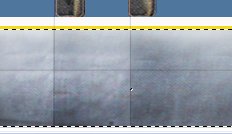
We currently have all of our bare metal selected from Step 1. The alpha channel is a grayscale image, going from 0,0,0 (black, liquid chrome) to 255,255,255 (white, no reflections). We will use shades of light gray for our reflections, to keep it subtle. If you want a highly polished surface, just make the gray darker. I will use 214,214,214 as the gray color value for our bare metal. Click on the foreground color in the Color Palette and enter 214 into the Red, Green, and Blue text boxes. That should result in a gray color with RGB values of 214,214,214. Click OK. Choose the Flood Fill Tool and set tolerance to 200. Then click inside all of the areas we have selected. These areas will turn light gray, signifying that they will be reflective in FS. When happy with all of the bare metal areas, choose Selections/Invert. Now all of the painted areas are selected. Click on the foreground color in the Color Palette and select 255,255,255 white. This is not reflective at all. Choose the Flood Fill Tool again and click into all of the selected areas. They will turn white. Now use the Paint Brush Tool to paint any stray bare metal pixels white. You can also choose the gray again and paint any stray painted pixels that got painted white. These effects are subtle, so you may not choose to get every last pixel - I know I don't! I just make sure that the majority of the painted areas are white, and the majority of the bare metal areas are gray. I leave lots of stray pixels around. |
| Now let's save our alpha image. Choose File/Save. Use this _alpha BMP file when you create your FS textures (Part 2, Step 2). You should see a nice reflection on the bare metal, and none on the painted surfaces. |
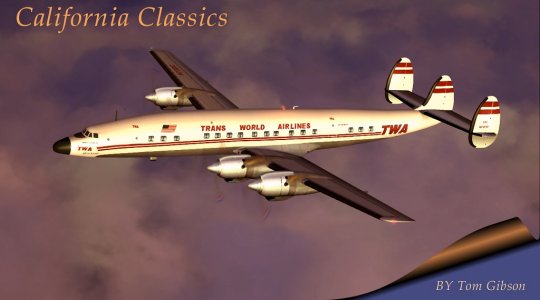
That completes the daytime texture - congratulations!
Let's move on to Part 5 - Night Lighting