
1. Get the RGB value of the color in the current image.
For example, we will use a Navy light gray from a modern P-3 Orion that I want to backdate to the original white and dark gray colors:
R: 217
G: 216
B: 212

2. Get the RGB value you want to change to.
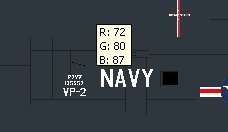
I want to change part of this plane to the old Navy dark gray. I'll get this color from the AI Neptune:
R: 72
G: 80
B: 87
3. Select the parts of the texture you want to change to the new color. Include all detail pixels that you want to change along with this "base color" (panel lines, etc.). Exclude any lettering, placards, etc. that you want to retain their original colors.

4. Examine the starting and ending RGB numbers - they will fall into 3 types:
a. 123 to 205: Increase is less than starting color (123) (205 - 123 = 82, which
is less than 123). Use Method 1.
b. 123 to 252: Increase is greater than 123 (252 - 123 = 129, which is greater
than 123). Use Method 2.
c. 199 to 120: All decreases - use Method 1.
We'll look at Method 1 first, since this example is all "decreases":
5. Divide the final number by the starting number:
72 / 217 = 0.33
80/216 = 0.37
87/212 = 0.41
6. Now multiply these numbers by 100:
33
37
41
7. Finally, subtract 100 from these numbers:
33-100 = -67
37-100 = -63
41-100 = -59
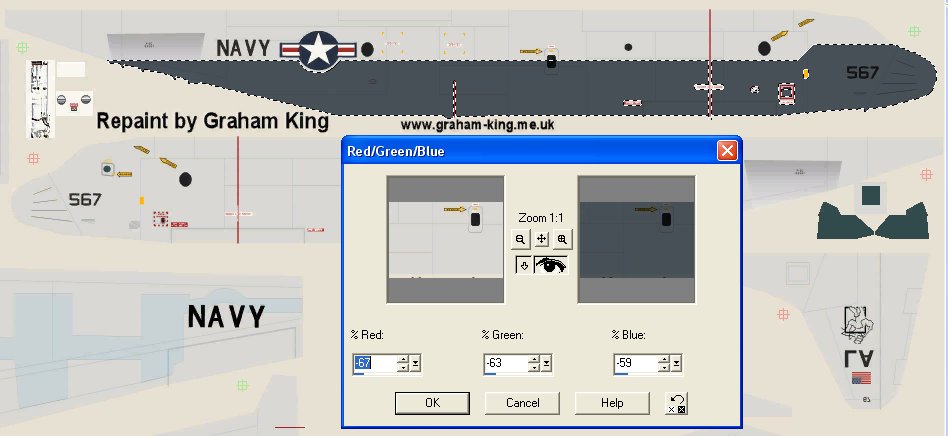
6. Now in PSP choose the menu item Colors/Adjust/Red-Green-Blue
7. Enter the numbers into the three boxes:
% Red: -67
% Green: -63
% Blue: -59
8. You will see your selected area change from the old color to the new one, with all detail pixels changing too. Click OK.
9. Now use the Line tool, etc. to clean up the edges of your selection, if there were any curves or diagonal lines in the selection.

I would now invert my selection, exclude the markings, and change the gray to white. Done!
Now let's look at Method 2.
This is required because the Red/Green/Blue (R/G/B) box only goes up to 100% (which doubles the color number). If you have a color like 30 that you want to change to 216, that is a lot more than 30 doubled! So what we have to do is use this R/G/B box more than once, doubling the color value each time.
An example:
Change color 33 to color 209. Since we have to double the color each time, it becomes: 33 X 2 = 66 X 2 = 132 = X 2 = 264. Woops, that last number is too high. But we now know we have to use the R/G/B box twice at 100% (doubling the number), and a third time at some other number to get it to color 209. You must click OK and re-open the dialog box each time you use it.
The steps to get that last number:
1. Take the desired final color number and divide it by the last correct number
in the X2 process: 209 / 132 = 1.58.
2. Multiply it by 100: 158
3. Subtract 100: 158-100 = 58
4 . Enter this value for the third time using the R/G/B box.
Here is an example which uses all 3 techniques in the same color change, to make it clear just how to do it.
1. We will start with a horrible purple color:

2. And will change it into a horrible green:

3. Start by figuring out the method needed:
R: 124 to 205 - increase is less than starting number (124) - use Method 1
G: 43 to 216 - increase is greater than starting number (43) - use Method 2
B: 131 to 67 - decrease - use Method 1
4. Start with the RED (Method 1):
205/124 = 1.65, X100 = 165, 165-100 = 65%
5. Now the GREEN (Method 2):
43 to 86 to 172 to 344, 216/172 = 1.26, X100 = 126. 126-100 = 26%
(100%, 100%, 26%)
6. Finally, the BLUE (Method 1):
67/131 = 0.51, X100 = 51, 51-100 = -49%
7. So now open the R/G/B box and enter:
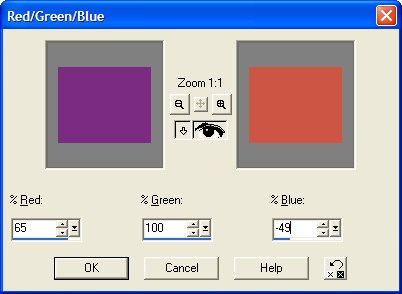
Click OK.
8. Open the R/G/B box again. For the second run, we need to set the Method 1 colors at 0 (no change), and continue with the Method 2 colors:
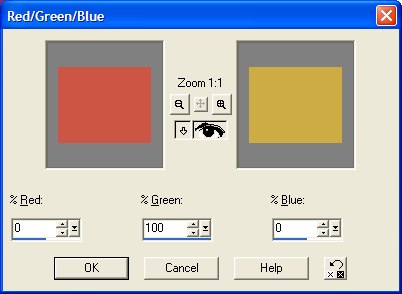
Click OK.
9. Open the R/G/B box again. Finally, for the third and final run, we enter the last value needed:
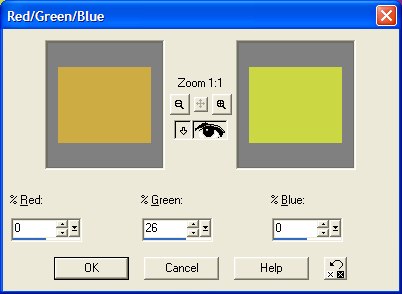
Click OK.
10. That's it - we now have our final color, within 1 color value:
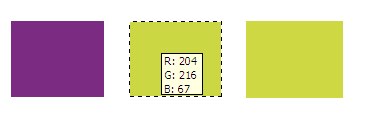
Hope you enjoyed it. :)
Tom Gibson